

There once was a desk that was dearly loved, but was forgotten about,and put in a dark basement. Surviving two moves, and still having a lot to offer, this desk was not going anywhere. This desk was begging to be made over, but the owner had no idea what to do. See, she has tried several DIY projects that did not turn out right, so she gave up. So she thought….
Since the birth of my second daughter she has been sleeping in our room. ( The 2 before her were not allowed, go figure.) I decided I needed my room and bed back. No more unicorn pillow decorations for my bed, no more mid-night slugs to the face, no more pee accidents in my bed. I want my bed back. So that meant my two girls, ages 12 and 4 were going to have to share a room. With much protest from the 12 year old the move was made. The 4 year old was moving in with her. So that meant a room make over was going to happen. I wanted them to both feel like they had a personal space while sharing the room with each other. Hence project #1.
Project #1: The desk
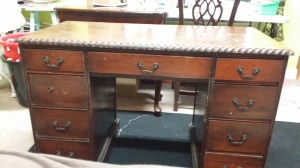
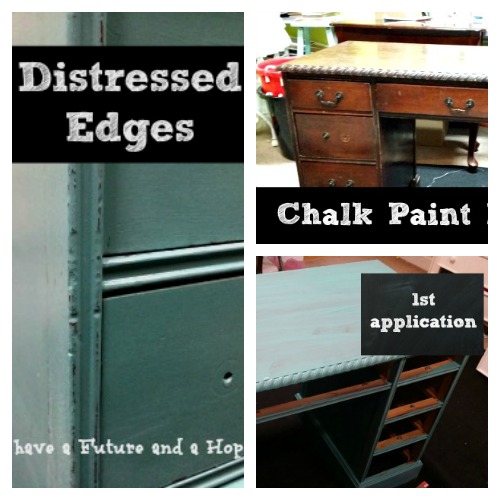
The girls needed a desk, so I did what most people would do, I went to Target! I saw the prices on some of the desks and decided I could find a better deal somewhere. We are on a tight budget so I never buy anything unless it is on sale, or free. I couldn’t find anything, until I went shopping in my own basement. I was walking through the basement one day and my beloved desk caught my eye. I remembered seeing some DIY projects that used chalk paint. I figured it sounded easy enough for me to try, so I did. I didn’t even have to sand the desk first,with chalk paint there is no need to.
Here are the supplies that I used: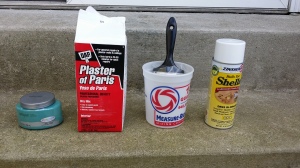
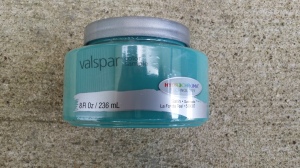
- Lowes has Valspar paint sample jars for sale near the paint chips. They are exactly 8oz. and are only $2.98. I bought 3 of these and had way more than enough.
- Container of Plaster of Paris, also found near the paint.
- Paint container for mixing, and using while painting.
- Paint Brush
- Can of Shellac or Furniture Paste Wax ( I chose the spray shellac for time constraints)
How to mix the paint:
- In the paint container add 1/3 cup Plaster of Paris.
- Add 1/3 cool water.
- Mix these two well.
- Add 8 oz. paint, color of your choice, and mix well.
- Now paint away!
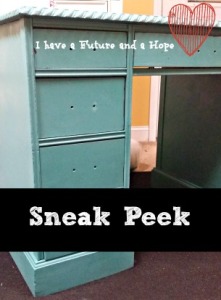
This paint dries quickly, so you are not going to have to wait hours in between coats. You may only need one coat if you are going for a dry brush effect. I painted 2 coats onto the desk, letting it fully dry between applications. I then wanted to distress the edges. I took a fine sand paper to the edges and distressed away. After that was done, I took the desk outside and sprayed a coat of shellac on everything. I let that dry, and then applied one more coat of shellac. I let it dry overnight. Now all it needs are new pulls for the drawers, but you’ll have to wait to see the finished product during the reveal. Ha!
Have fun and don’t be afraid to do a DIY project, especially one this easy!
Alana


I LOVE IT!!!! You have the same color sense as I do! I swear we are long lost sisters!